
Aconity3D have just released the latest version of their AconitySTUDIO user interface for Aconity3D metal 3D printers, the easiest version to use yet. A lot has changed since version 3.3. In AconitySTUDIO 3.3, they have introduced a new user management system, made the control center more powerful than ever, continuously improved the test center, and enhanced the dashboard with a fresh, radiant look.
Here’s what improvements you can expect for your day-to-day work:
- New Parameter Panel and Job Editor
- Layer Adaption
- New Preprocessing Functions
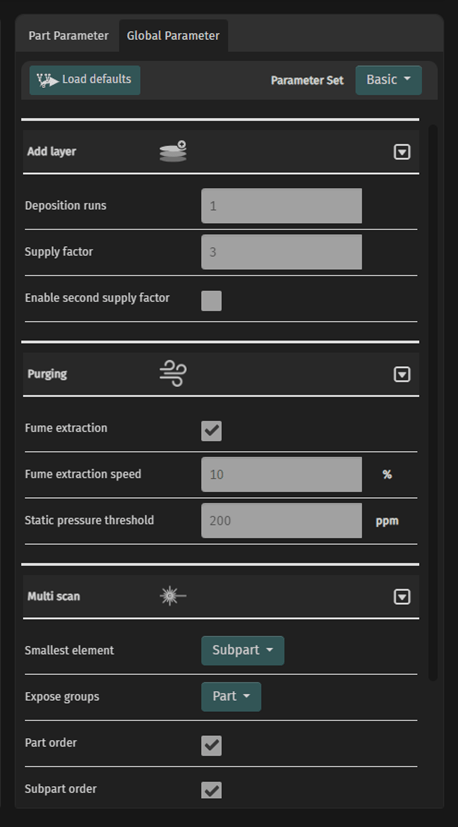
1. Parameter Panel
Aconity3D have extended the global parameters and simplified the part parameters.
In the global parameters, you can now adjust purging limits, heating targets, and multi-scan options. The layer thickness setting has been removed – more on that later.
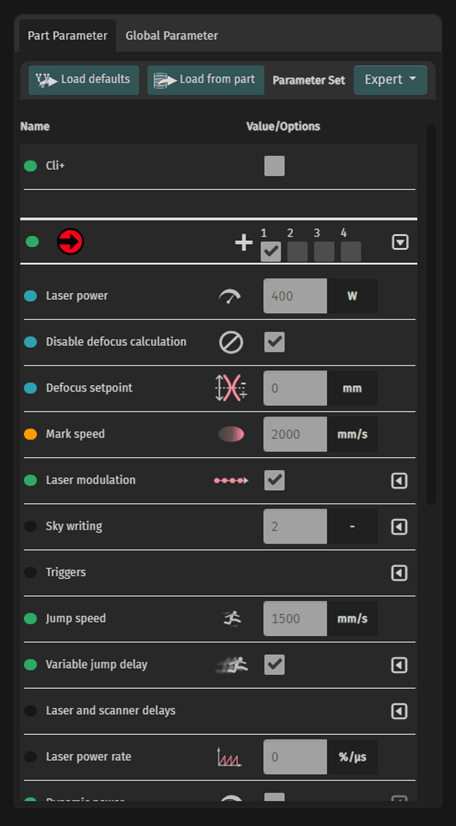
In part parameter a lot has changed. For example, they got rid of the part groups and in the process signitficantly streamlining the parameter management for parts. Every (sub)part now has its own parameter set, which can be adjusted either individually or by selecting multiple parts at once and overwriting all their values. To make it even easier to spot differences between parts, all entries are color-coded.
2. Layer Adaption:
As you might have noticed, there was no mention of layer thickness as a parameter. That’s because they have completely removed it. Layer thickness is no longer adjustable, as it is now possible to mix parts with different thicknesses in one job. AconitySTUDIO automatically determines the necessary layers and their heights based on all the parts used.
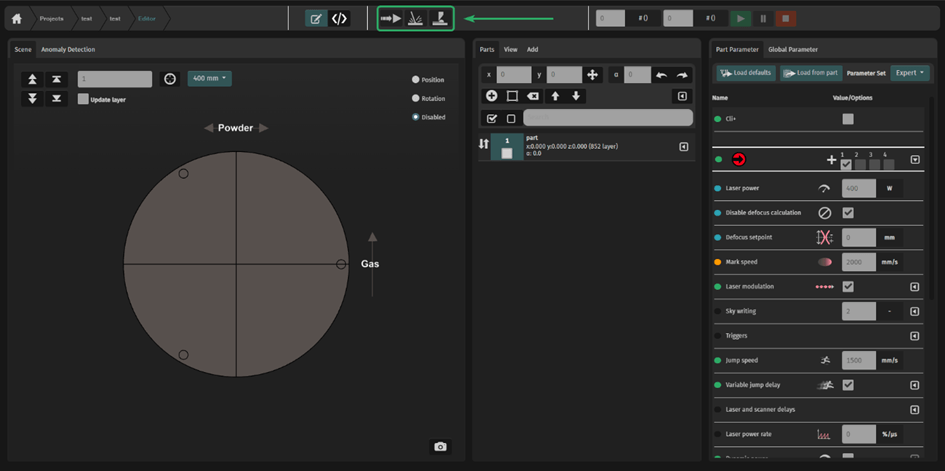
3. Preprocessing
These functions can be found in the job editor’s toolbar and provide an easy way to prepare the machine for a job start.
First, there is a function to prepare the job environment. This includes purging the chamber according to global parameter settings, enabling the fume extraction when a safe oxygen level is reached, and preheating the platform if desired.
Second, there is a one-click solution to expose the layer set as the lower range limit. Instead of manually writing a script to ensure fusion in the first layer, this can now be done with just a few clicks.
Finally, there is a one-click layer deposition function for similar purposes.
Of course, many other changes have been made under the hood to provide the most stable version to date. Aconity3D have focused on features like session export to ensure a smooth working environment for you. More information and an extensive video are also available in our AconityACADEMY.
If you are interested in any of these features, get in touch we can organise a demo.